안녕하세요! 😎😎
최근에 일도 바쁘고 여러 가지 일들이 있어서
(사실 모두 핑계입니다... 🫥🫥)
글 작성을 못하고 있었는데요
다시 마음 잡고 작성 해볼까 합니다. 😤
이번에는 Flutter ListView Widget에 관하여 알아보겠습니다.
ListView 생성하는 간단한 방법
- ListView - 명시적으로 ListView 생성자 호출하고 children을 전달
- ListView.builder - Android의 RecyclerView, iOS의 TableView와 비슷한 방식
- ListView.separated - 구분자를 사용하여 아이템을 구분하는 방식
✔️ ListView children으로 아이템 전달 방식

class HomeScreen extends StatelessWidget {
  const HomeScreen({Key? key}) : super(key: key);

  @override
  Widget build(BuildContext context) {
    return Scaffold(
      appBar: AppBar(
        title: const Text('home screen'),
        shadowColor: Colors.redAccent,
      ),
      body: ListView(
        padding: const EdgeInsets.all(8),
        children: <Widget>[
          Container(
            height: 150,
            color: Colors.amber[600],
            child: const Center(child: Text('Entry A')),
          ),
          Container(
            height: 50,
            color: Colors.amber[500],
            child: const Center(child: Text('Entry B')),
          ),
          Container(
            height: 850,
            color: Colors.amber[100],
            child: const Center(child: Text('Entry C')),
          ),
        ],
      ),
    );
  }
}
생각보다 간단한 방법입니다.
ListView()의 기본 생성자 children을 이용하여 원하는 위젯들을 전달해 주면 됩니다.
하지만 이와 같은 방식은 자주 사용되지 않을 가능성이 높다고 생각합니다.
개발과정에서 우리가 항상 마주치게 되는 상황은
데이터 리스트를 받아오고 그 리스트를 이용하여 ListView를 구성하는것이죠.
ListView.builder를 사용한다면 가능합니다!
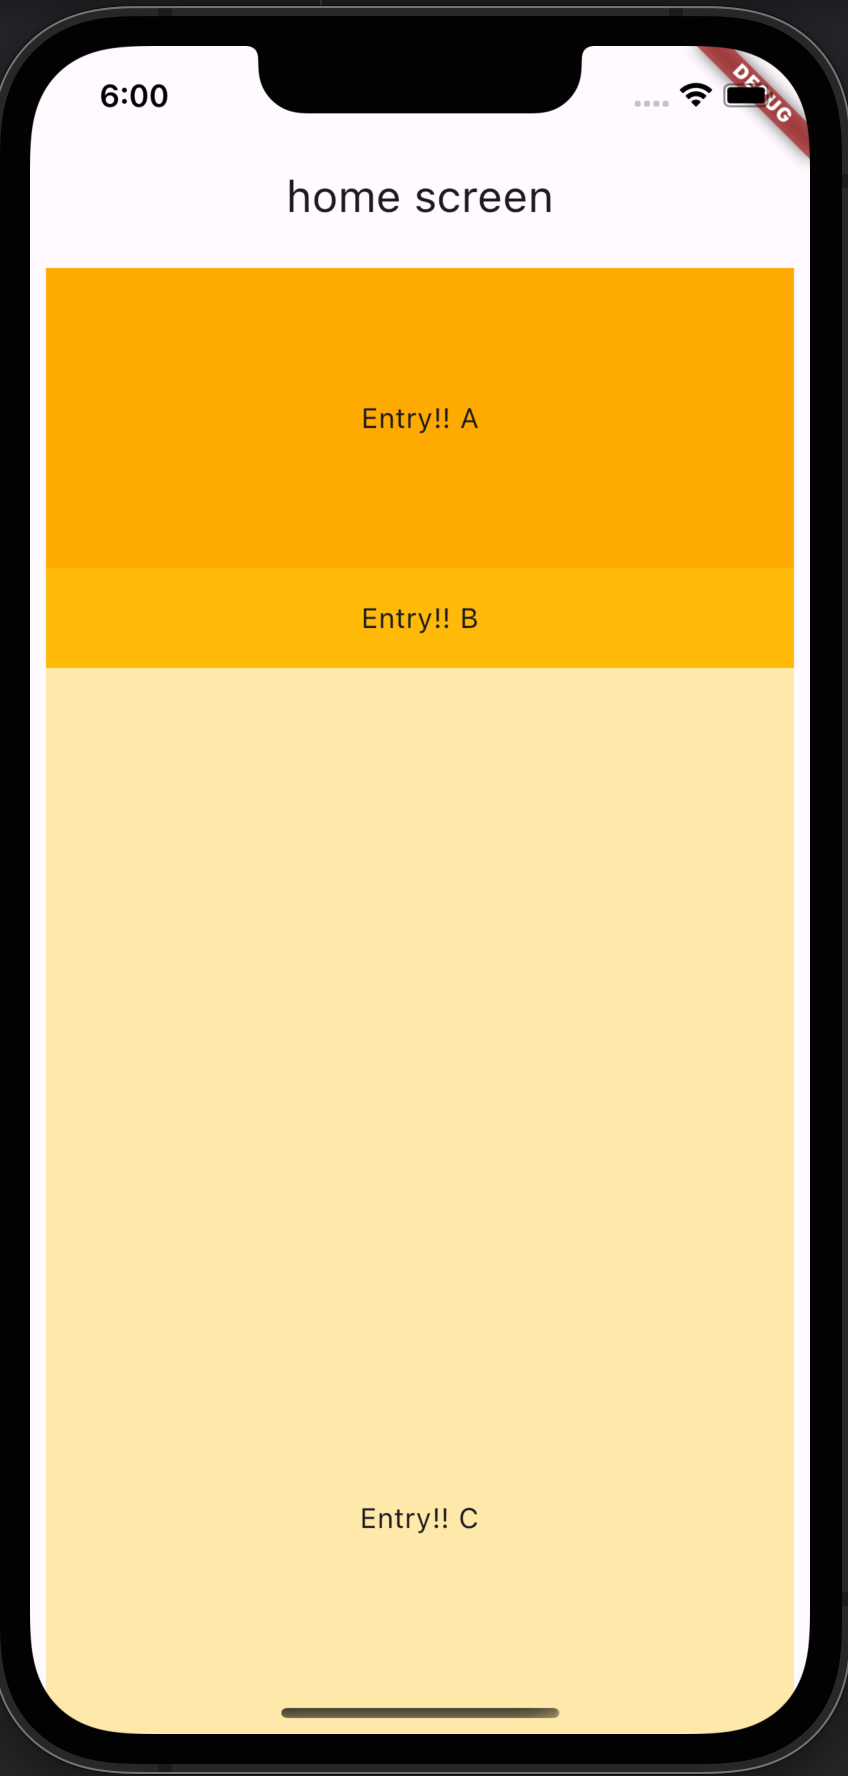
✔️ ListView.builder 방식

final List<String> entries = <String>['A', 'B', 'C'];
final List<int> colorCodes = <int>[600, 500, 100];
final List<double> heights = <double>[150, 50, 850];

class HomeScreen extends StatelessWidget {
  const HomeScreen({Key? key}) : super(key: key);

  @override
  Widget build(BuildContext context) {
    return Scaffold(
        appBar: AppBar(
          title: const Text('home screen'),
          shadowColor: Colors.redAccent,
        ),
        body: ListView.builder(
          padding: const EdgeInsets.all(8),
          itemCount: entries.length,
          itemBuilder: (BuildContext context, int index) {
            return Container(
              height: heights[index],
              color: Colors.amber[colorCodes[index]],
              child: Center(
                child: Text('Entry!! ${entries[index]}'),
              ),
            );
          },
        ));
  }
}
제 개인적인 생각으로 🤔🤔
Android의 RecyclerView, iOS의 TableView와 가장 비슷한 느낌으로 사용되는
Flutter의 Widget이 아닐까 생각합니다.
(물론 저는 아직 Flutter와 친해지는 중이라... 팩폭과 조언을 댓글로 남겨주시면 달게 받겠씁니다... 🙏🙏 )
ListView.builder의 핵심은 'itemCount'와 'itemBuilder'입니다.
'itemCount'는 ListView의 아이템의 총개수를 의미하며
'itemBuilder'의 index는 'itemCount'만큼 반복됩니다.
즉 'itemBuilder'는 'itemCount'만큼 반복되며, ListView의 아이템을 생성합니다.
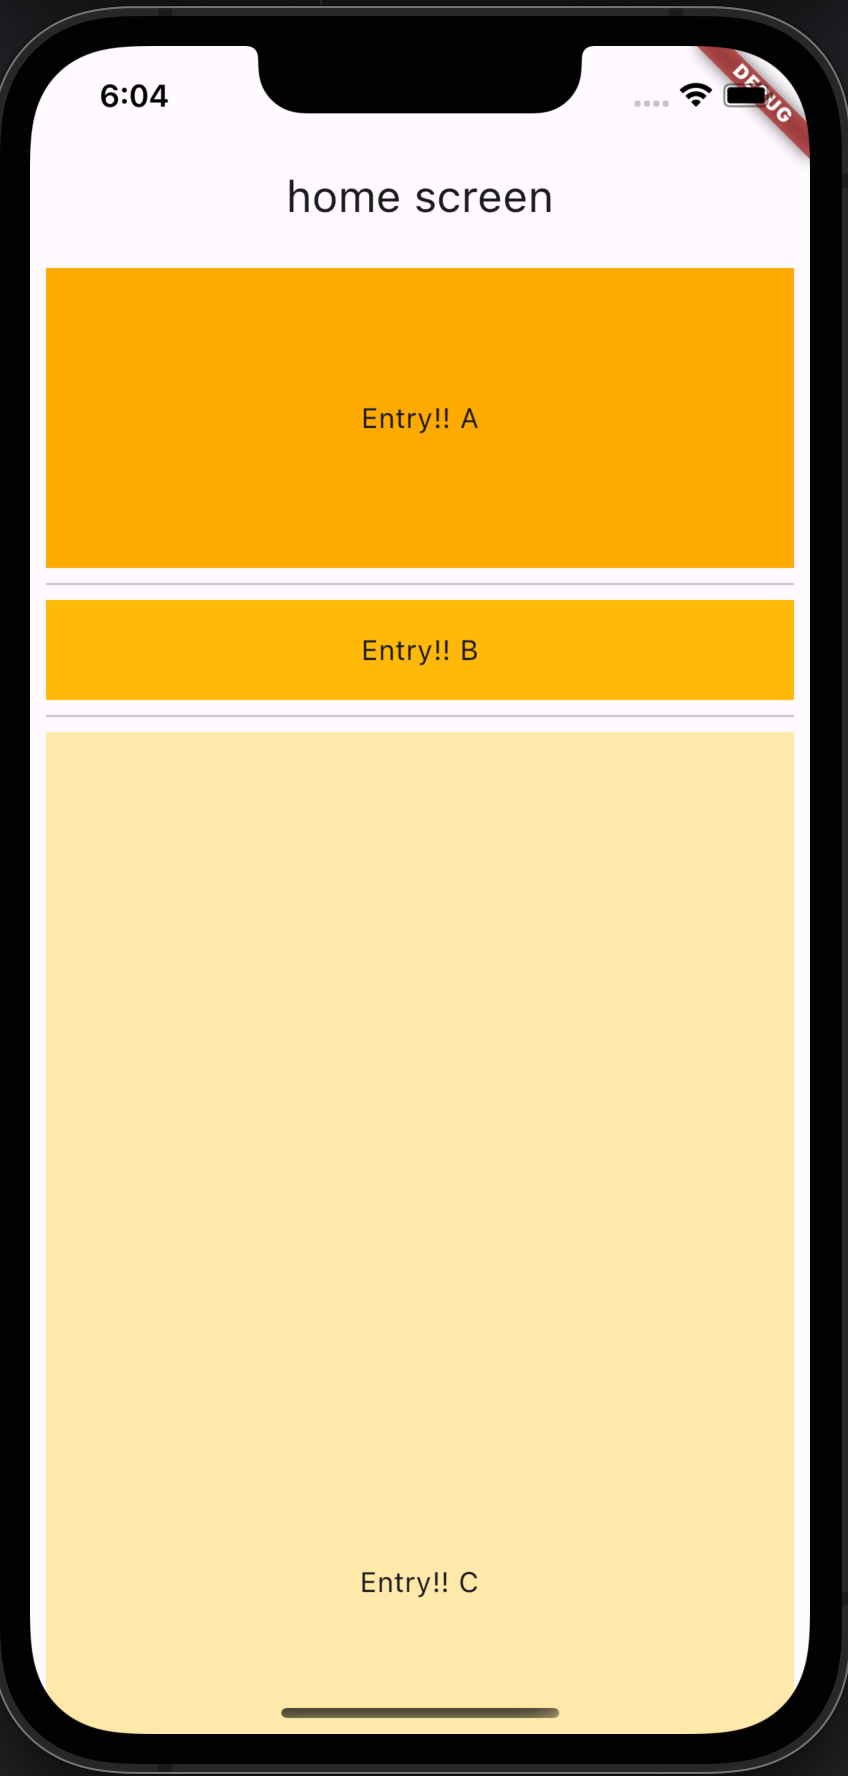
✔️ ListView.separated 구분자 추가 방식

class HomeScreen extends StatelessWidget {
  const HomeScreen({Key? key}) : super(key: key);

  @override
  Widget build(BuildContext context) {
    return Scaffold(
        appBar: AppBar(
          title: const Text('home screen'),
          shadowColor: Colors.redAccent,
        ),
        body: ListView.separated(
          padding: const EdgeInsets.all(8),
          itemCount: entries.length,
          itemBuilder: (BuildContext context, int index) {
            return Container(
              height: heights[index],
              color: Colors.amber[colorCodes[index]],
              child: Center(
                child: Text('Entry!! ${entries[index]}'),
              ),
            );
          },
          separatorBuilder: (BuildContext context, int index) {
            return Divider();
          },
        ));
  }
}
ListView.separated의 방식은 위의 설명했던 ListView.builder의 방식과 동일합니다.
'separatorBuilder'라는 속성값만 제외한다면요!
보이는 그대로 구분자에 대한 빌더입니다.
ListView를 생성하다 보면 아이템들의 구분이 필요하거나, 디자인적으로 특이한 UI가 필요하다면
'separatorBuilder' 속성을 이용하여 구분에 필요한 구분 위젯을 정의해 두면
알아서 아이템 사이사이 정의해 둔 Widget을 이용하여 구분합니다.
ListView class - widgets library - Dart API
A scrollable list of widgets arranged linearly. ListView is the most commonly used scrolling widget. It displays its children one after another in the scroll direction. In the cross axis, the children are required to fill the ListView. If non-null, the ite
api.flutter.dev
여기까지 간단하게 Flutter의 ListView에 대하여 알아봤습니다.
앞으로는 Flutter에 대해 공부한 자료를 지속적으로 정리해 봐야겠습니다.
여기까지 저의 긴 글을 읽어주셔서 감사합니다.
제가 습관적으로 코딩을 하는 그날까지 습관적으로 코딩을 하기 위해 글 작성을 꾸준하게 해 보겠습니다.


최근댓글